
FiveM LED Strips and Underglow: The Complete Guide
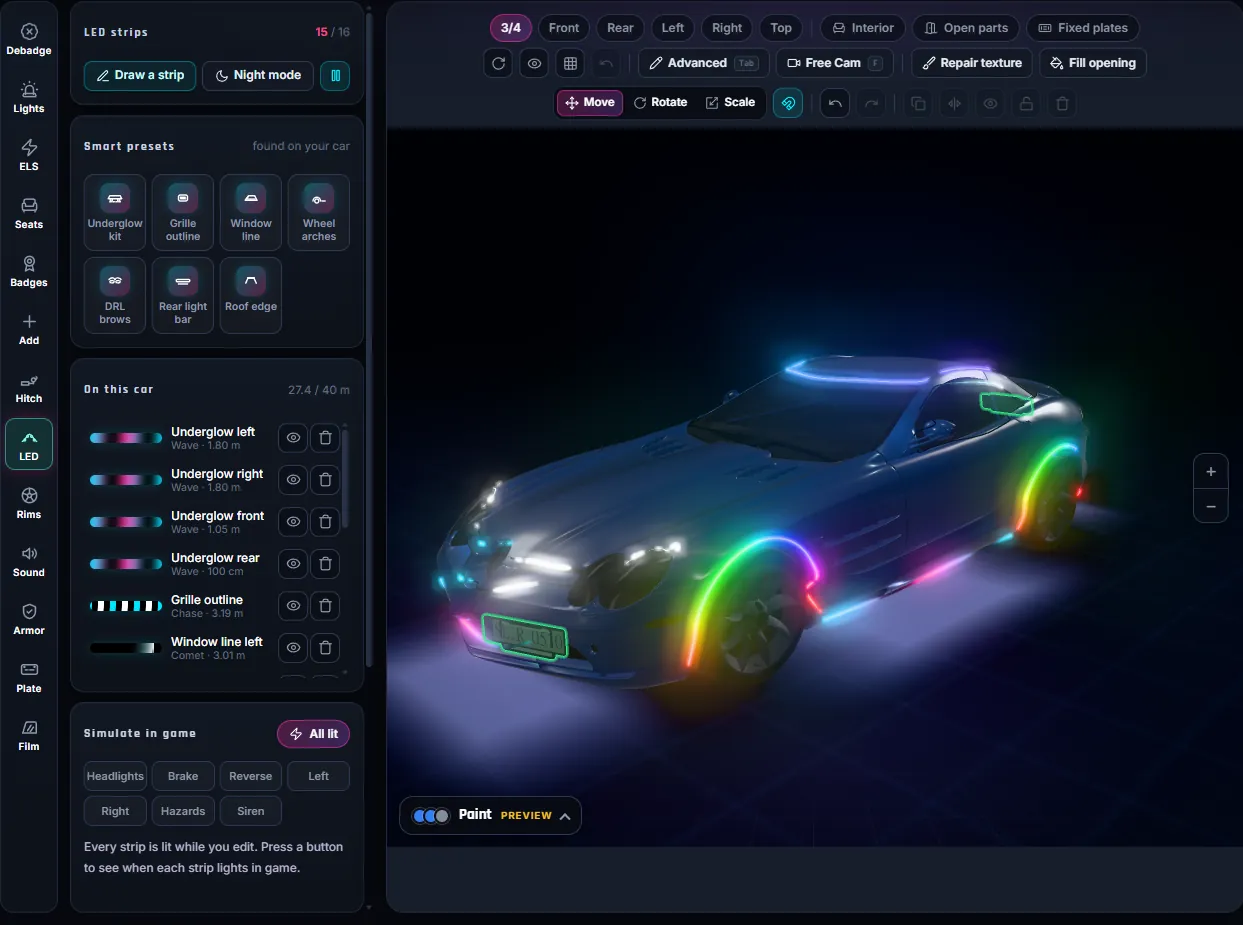
You can add LED strips to a FiveM car without writing a script: draw them on the body in a 3D editor, pick an effect, and the build puts real light-emitting strips on the car model plus a small client script for the animation. This guide covers what the strips are, how GTA lights them, how to place them well and how to fix them when they do not glow.
- What you get: LED strips as real geometry on your car, with 13 animated effects, 1 to 6 colour stops and triggers that follow the car’s own lights.
- Where: the LED tool of the FiveMRides Vehicle Studio, in your browser, with a free 3D night preview.
- Cost: 1 credit for all the strips on one car. The tow hitch tool is free.
- In game:
/ledor J switches the strips on and off, K goes to the next effect. Both keys can be rebound.
What are LED strips on a FiveM car?
An LED strip in this context is a thin piece of 3D geometry that follows a line you drew on the car body, with a light-emitting material on it. It is part of the vehicle model, so it moves, opens and breaks with the car like any other part. It is not a particle effect and it is not a prop attached by a script.
That matters for two reasons. The strip can sit anywhere on the body (a grille outline, under the sills, around the wheel arches), and it can reuse the game’s own light behaviour, so a strip can light up with the brake lights, the indicators or the siren without any script deciding when.
If you only want the ground glow of classic underglow, read FiveM underglow: native neon vs LED strips first, because the two techniques are different and can be combined.
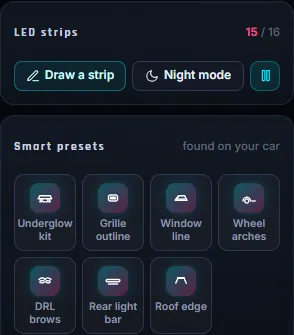
The 7 smart presets
The tool scans your car and offers presets that place strips for you. Each one is a starting point: every point stays draggable afterwards.
| Preset | What it draws |
|---|---|
| Underglow kit | Four strips under the sills and bumpers, facing down, with the ground glow switched on |
| Grille outline | A strip around the front grille |
| Window line | Loops around the side glass |
| Wheel arches | A ring over each wheel |
| DRL brows | A strip along the top edge of each headlight, lit with the headlights |
| Rear light bar | A pixel LED bar at tail light height, running a scanner effect |
| Roof edge | An aluminium channel along the roof edge |
Presets are placed from your car’s shape and bones, so on an unusual car they may need a nudge. That is normal: click a point and drag it.
Four strip profiles
- Flat strip: a thin tape, the cleanest look for outlines.
- Neon tube: a round tube whose width is its diameter. Good for wheel arches and underglow.
- Pixel LEDs: separate dots on black tape at a pitch you choose (60 per metre by default). Best for chase and scanner effects because each LED is visible.
- Aluminium channel: a metal U channel with a diffuser, a more factory look.
Width runs from 4 mm to 4 cm and the strip can sit up to 5 cm off the surface. Keep it a few millimetres off the paint so it does not flicker against the body panel.
13 effects and the colour controls
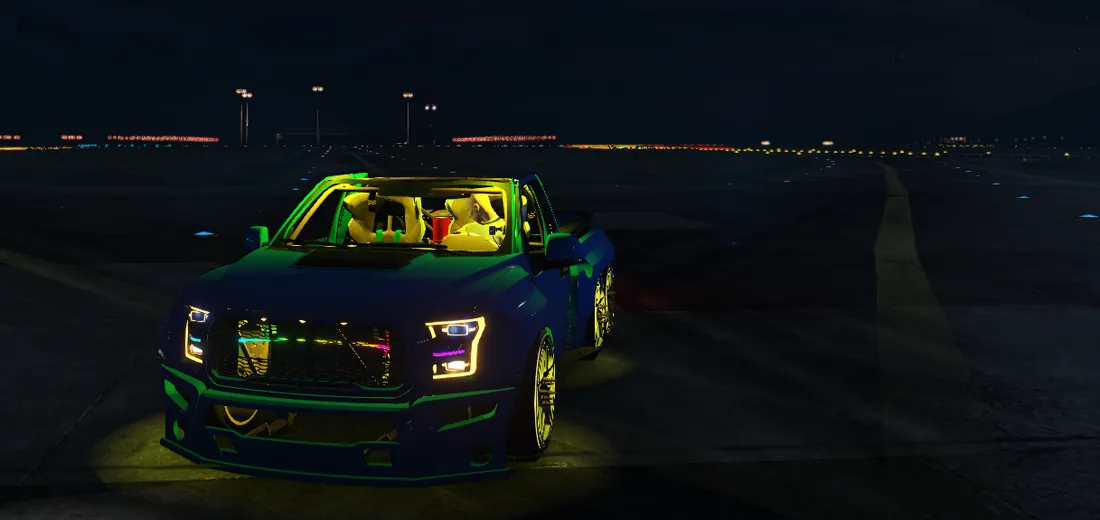
Effects are live in the preview, so you see what players will see: solid, gradient, breathe, strobe, chase, comet, rainbow, wave, knight rider, police, sparkle, fire and sequential. Each takes 1 to 6 colour stops (rainbow ignores them), plus speed, brightness, direction (forward, reverse, centre out, out to centre) and a phase offset so two mirrored strips can run in sync or in opposite. The details of each effect, and what they cost the game, are in Animated car lights in FiveM.
Triggers: when does a strip light?
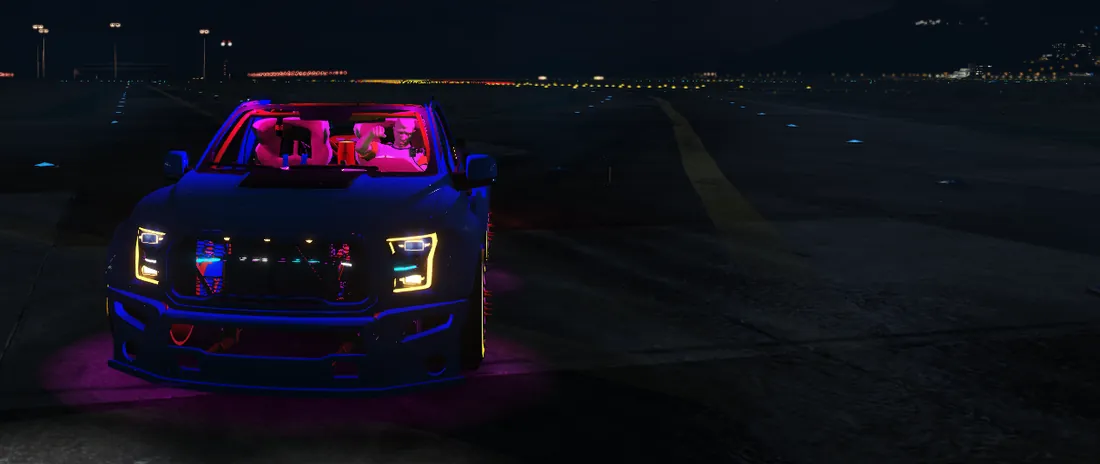
Each strip has one trigger: always, headlights, brake, reverse, indicator left, indicator right, hazards or siren. The headlight, brake, reverse and indicator triggers use GTA’s own light groups, so the strip follows that car’s lights with no script. The siren trigger lights the strip only while the car’s siren runs. How those light groups work is explained in FiveM car lights explained.
Underglow
A strip under the body can also light the ground. That uses the native neon lights of the car, coloured from the strip’s effect, and it is per car.
How do I add LED strips to a FiveM car?
- Open the Vehicle Studio. Go to the FiveMRides Vehicle Studio, sign in and upload your car. Analysis and the 3D preview are free.
- Open the LED tool. Click LED in the tool rail on the left.
- Add strips. Click a smart preset, or press Draw a strip and click points on the body. Click the first point again to close a loop, then press Enter.
- Style them. Choose a profile, an effect, colours, speed and brightness. Turn on Night mode to see the glow.
- Set the trigger. Pick always, headlights, brake, reverse, indicators, hazards or siren, and use the Simulate in game buttons to check it.
- Build and install. Continue to the build, download the resource, add it to your server and start it with ensure and the folder name.
In game: commands and keys
The resource includes a client script named fmr_led.lua. It registers /led (on or off for the car you are in), J to switch the strips on and off and K for the next effect. Players can rebind both keys in the FiveM key bindings. If a strip uses a car extra slot, it can also be switched from the vehicle menu extras.
What is per car and what is per model matters when two cars of the same model are near each other:
| Thing | Scope |
|---|---|
| Trigger on or off (brake, reverse, headlights, indicators) | Per car, native GTA lights |
| Strip on or off through an extra slot | Per car |
/led on or off, chosen effect, underglow | Per car, synced by the script |
| The animation frame you see | Per model, on each player’s screen |
The last row comes from how GTA textures work: the animated pattern is a texture shared by every car of that model. Two cars of the same model close together show the same frame, and each player sees the effect chosen by the car they sit in.
What we tested
We validated the strips in game on a sedan and a 6×6 pickup: the strips glow, J turns them off and on, K changes the effect and the underglow lights the ground. Other cars, other servers and GTA V Enhanced have not been tested, and a car with an unusual skeleton may need another bone choice.
Strips not glowing? Check this
- Is the resource started? Look for errors in the server console and confirm the ensure line.
- Daylight. Glow is far easier to see at night; at noon a strip can look like a coloured line.
- Trigger. A brake strip stays dark until you brake. Test with Simulate in game before you build.
- Animation switched off. The convar
setr fmrled_anim 0keeps still frames only. Remove it to get the animation back. - Distance. The animated texture is swapped in only while a car of that model is within 60 m; beyond that you see the still frame.
- Extras. If a strip is on an extra slot, check that the extra is on for that car.
Limits
- Up to 16 strips and 40 m of strip in total per car.
- Strips are made for vehicle files you have the right to modify. Check the licence of any car you upload.
- The animation comes from a client script, so a setup that blocks client scripts shows still frames.
FiveM LED strip questions
How do I add LED strips to a FiveM car?
Open the LED tool in the FiveMRides Vehicle Studio, upload your car, add a smart preset or draw a strip on the body, choose an effect and a trigger, then build and install the downloaded resource on your server.
Do I need to write a script for FiveM car LEDs?
No. The strips are part of the car model and the build adds a small client script for the animation and the /led command. You only add the resource to your server.
How much do the LED strips cost?
All the strips on one car cost 1 credit. The 3D preview, including night mode, is free with an account.
Which keys control the LED strips in game?
J switches the strips on and off and K goes to the next effect. Both can be rebound in the FiveM key bindings, and /led does the on and off from chat.
Can LED strips follow the brake lights and indicators?
Yes. Each strip has a trigger: always, headlights, brake, reverse, indicator left, indicator right, hazards or siren. The headlight, brake, reverse and indicator triggers use the car’s own GTA light groups.
How many LED strips can one FiveM car have?
Up to 16 strips with a combined length of 40 m.
Does it work on GTA V Enhanced?
We tested it in game on a sedan and a 6×6 pickup, and we have not tested GTA V Enhanced.